

Shift templates turn event roles and peak moments into payroll-ready schedules that cut no-shows and reconcile hours without the last-minute scramble. Every field in a well-built template, from role name to pay code, feeds directly into your timesheet records. Tools like Clockhq, a structured backup rule with staggered timings, and US Department of Labor overtime standards give you the framework. What follows covers core fields, a design method, payroll integration, and a sample template you can use today.
Table of Contents
- What shift templates actually do for event staffing
- Core fields every event shift template must include
- How to design templates from your event's success metrics
- Managing variable and freelance crews, including split shifts
- How shift templates connect to time tracking and payroll
- Sample event shift template and printable checklist
- Common pitfalls and how to avoid them
- How Clockhq implements shift templates in practice
- Customizing shift templates for different event types
- Keeping shift templates accurate over time
- Using shift templates to improve on-site communication
- Key takeaways
- What actually works when you build these in the field
- Clockhq makes your event templates work on the day
- Useful sources and references
What shift templates actually do for event staffing
A shift template is a reusable operational document that defines every role, task, time window, and pay condition for a specific event position before a single name is assigned. Unlike a fixed weekly roster, an event template is rebuilt around each event's demands.
The role of shift templates in event staffing goes beyond scheduling. Templates protect peak moments, create a paper trail for payroll, and reduce the admin overhead of rebuilding a plan from scratch each time. Demand-led templates staff for failure points, not averages, which is why they outperform headcount-based rosters.
Three immediate wins for small managers:
- Fewer payroll errors because hours, breaks, and pay codes are set before the event
- Faster onboarding because every staff member gets the same briefing in the template
- Fewer no-shows because confirmations are built into the publication workflow
Core fields every event shift template must include
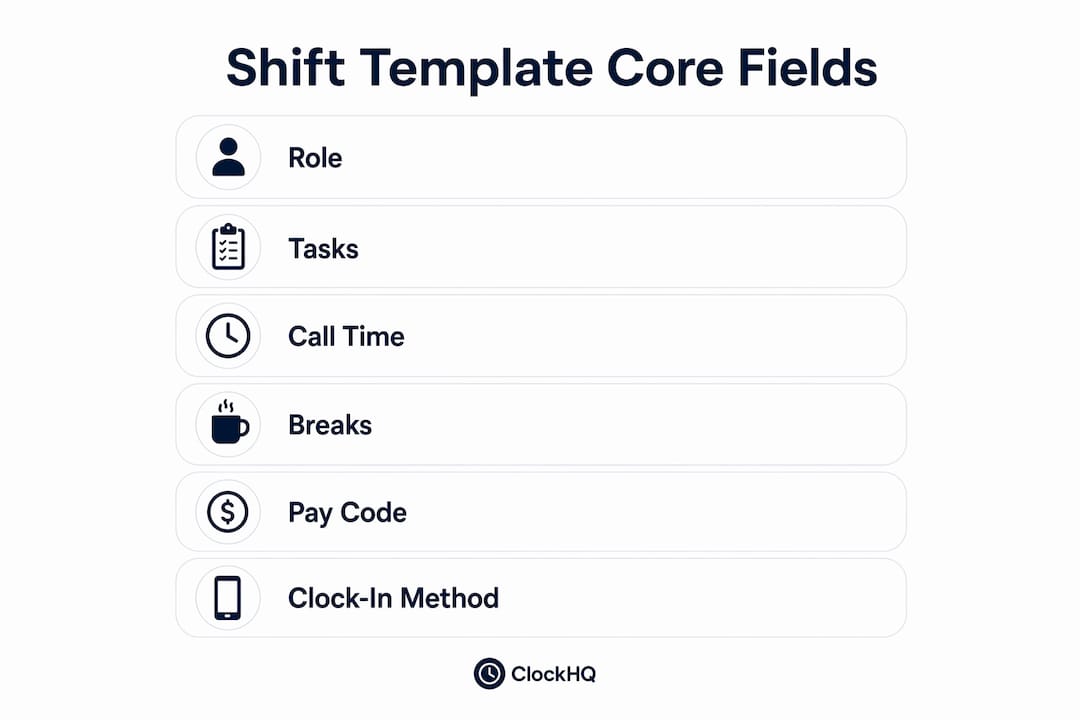
Every template must capture role, tasks, call time, breaks, pay code, and clock-in method. Miss one and either operations or payroll will break.

| Field | Why it matters |
|---|---|
| Role name | Ties the shift to a pay code and qualification check |
| Task list | Tells staff exactly what they do, reducing on-site questions |
| Call time vs. shift period | Call time is when staff arrive; shift period is paid time |
| Break slots | Break rotations must be scheduled, not assumed |
| Certifications required | Food handler card, TIPS certification, SIA license |
| Supervisor name and contact | One named person prevents twelve calls to the manager |
| Zone or location | Venue section, entrance, backstage, floor |
| Pay code | Links the role to the correct rate in payroll export |
| Clock-in method | QR code, PIN, or GPS so actual hours are captured |
| Contingency or standby flag | Marks the position as primary or backup |
Setup and teardown hours count as paid time under the Fair Labor Standards Act. Build them into the shift period, not a footnote.
How to design templates from your event's success metrics
The core method: state what staff must achieve, break that into tasks, map tasks to roles, then size shifts around peak moments. Planning by task and timeline produces more accurate role definitions than any guest-count ratio.
- Define the success metric. What does a good event look like? Fast registration flow, zero queue at the bar, safe crowd movement. Write it down.
- List the tasks that deliver it. Registration requires check-in scanning, guest direction, and badge printing. Each task is a potential role.
- Map tasks to roles. Group related tasks into a single role where one person can cover them. Split where the workload demands it.
- Build a timeline. Mark setup, peak service, and teardown windows. Demand-driven calendars pull from confirmed bookings and flag compliance constraints before shifts are published.
- Identify peak stress points. Staff those moments first. A door team that is thin during the first 30 minutes of a concert creates a cascade of problems.
- Plan shift overlaps. A brief overlap period between incoming and outgoing shifts prevents handover gaps, especially for catering and security.
- Assign standby using the 15–30–60 rule. Designate standbys available 15, 30, or 60 minutes before call time with explicit contact details in the template.
Pro Tip: Add a "briefing notes" field and a supervisor contact directly inside each shift record. The template then doubles as a communication channel, so staff arrive knowing the dress code, meeting point, and escalation path without a separate email.
Managing variable and freelance crews, including split shifts
Templates must include availability status, role qualifications, and confirmation status for every assignment. Without those three fields, a published shift is a guess.
Split shifts need their own treatment. Record each segment with its own call time, expected active minutes, and any paid travel or setup time between segments. A bartender who works 3:00 PM–6:00 PM and then 9:00 PM–midnight has two separate shift records, not one long one.
For confirmations, build a three-stage process into the template workflow: initial invite, 48-hour confirmation, and a final check 24 hours before call time. The 15–30–60 standby rule kicks in when a confirmation goes missing. Standbys listed in the template can be activated without ad-hoc searching.
Pro Tip: Include dress code and briefing notes as required fields in every assignment record. Staff who arrive in the wrong outfit or without knowing the client brief create on-site friction that slows the whole team down.
How shift templates connect to time tracking and payroll
A template is only payroll-ready when every scheduled shift maps to an actual clock-in and a consistent pay code. The schedule and the timesheet must match.
Integration checklist:
- Clock-in method confirmed: QR code, PIN, or GPS set per role in the template
- Auto-break rules applied: break thresholds configured to match the shift length (the FLSA requires a 30-minute unpaid meal break for shifts over a certain duration; check your state's specific rules)
- Overtime flags active: any shift exceeding 40 hours in a week or 8 hours in a day (California) triggers an overtime flag before payroll export
- Pay codes mapped: each role type has a default pay code so exports land in the right payroll category
- Payroll export format set: CSV or your payroll system's native format, generated after the event
Reconciliation steps: match scheduled hours against actual clock-out times, resolve exceptions (late arrivals, early departures, missed clock-outs), apply approved swaps, then generate the export. Digital timesheets cut the manual matching step significantly.
This article covers general operational guidance, not legal advice. Confirm break and overtime rules with the US Department of Labor or a qualified employment attorney for your specific situation.
Sample event shift template and printable checklist
A complete template maps every field to both operations and payroll. The sample below covers a single event position.
| Field | Sample entry |
|---|---|
| Role | Guest Services Lead |
| Tasks | Check-in scanning, badge printing, guest direction |
| Call time | 3:30 PM |
| Shift period | 4:00 PM–9:00 PM |
| Break | 6:15 PM (covered by standby) |
| Certifications | None required |
| Supervisor | Maria Chen |
| Zone | Main entrance, Table A |
| Pay code | GS-STD |
| Clock-in method | QR code |
| Standby | James R., available from 3:00 PM |
Pre-publish checklist:
- No overlapping shifts for the same staff member
- Break coverage assigned for every role
- Standby named and contact confirmed
- Pay codes set for all positions
- Confirmation sent and received from each assignee
- Supervisor contact in every shift record
A pre-event verification run the day before catches most last-minute failures before they become your problem on-site.
Common pitfalls and how to avoid them
These are the errors that break events or produce payroll disputes.
- Staffing for averages, not peaks. Fix: map your busiest 30-minute window and staff that moment first.
- Missing break rotations. Unplanned breaks leave zones uncovered during surges. Write break times and coverage assignments into every shift.
- Unclear role ownership. Two people assigned to the same zone with no defined lead creates confusion. Name a zone owner in the template.
- No standby plan. One no-show at a gate can hold up an entire queue. Apply the 15–30–60 rule for every critical position.
- Pay codes not mapped. Roles without pay codes produce manual corrections in payroll. Set defaults by role type before publishing.
- Setup and teardown omitted. Those hours are paid time under the FLSA. Include them in the shift period.
The day before the event, run the pre-publish checklist above. Confirm break coverage, standby contacts, and that every shift has a clock-in method assigned.
How Clockhq implements shift templates in practice
Templates become operational when they live inside scheduling and time-tracking software, not a spreadsheet. Clockhq maps each template field to a specific feature.
Clockhq's shift creation tool lets you build a role-based roster with call times, break thresholds, and pay codes set per position. QR code and PIN clock-in capture actual start and end times against the scheduled shift. Auto-break detection flags when a break threshold is crossed without a recorded break. Split-shift support tracks each segment separately, which matters for freelance crews working non-consecutive hours. After the event, a payroll-ready CSV export matches scheduled roles to actual hours, ready for reconciliation.
Pro Tip: Set default pay codes for each role type in Clockhq before you build the event roster. That one configuration step means every shift exports with the correct rate, and you skip the manual code-matching step at payroll time.
Field service teams and event crews use the same logic: the template is the plan, the app is where it runs.
Customizing shift templates for different event types
Conferences, concerts, and trade shows each have different peak patterns, and your templates should reflect that.
Conferences front-load demand. Registration opens, and the first 90 minutes are the highest-pressure window. Build your heaviest staffing into that block, then taper. Add a dedicated AV support role if the event runs breakout sessions.
Concerts have a hard arrival spike, a long mid-event lull, and a compressed exit. Staff the doors and merchandise heavily at open, reduce mid-show, and bring a second wave back for close-out and crowd management.
Trade shows run multi-day with exhibitor setup the day before. Create a separate setup-day template with different roles and pay codes from the show-floor template. Booth staff often need product knowledge certifications tracked in the system.
For all event types, experience-first staffing means tracking certifications and personality fit in your scheduling system so qualified staff are matched to client-facing or safety-critical roles automatically.
Keeping shift templates accurate over time
A template that never gets updated becomes a liability. After each event, capture what actually happened: which zones ran short, where breaks were skipped, and which roles were over-assigned.
Build a short post-event review into your workflow. Compare scheduled hours to actual clock-out data, note any standby activations, and flag roles where the task list was inaccurate. Update the template before the next similar event.
Version your templates by event type and date. A concert template from March will be more accurate than a generic one built from scratch. Over time, your template library becomes a performance record, not just a planning tool.
Using shift templates to improve on-site communication
A shift template published in a scheduling app is a live communication document. Every staff member sees their role, tasks, supervisor contact, and briefing notes in one place before they arrive.
That single source of truth cuts the volume of pre-event questions. When dress code, meeting point, and escalation path are in the assignment record, staff don't need to call the manager. Scheduling software that pushes shift notifications also confirms receipt, so you know who has read the brief.
For multi-zone events, assign a zone lead in each shift record and give them visibility into their team's confirmations. That structure means the manager is coordinating leads, not fielding individual questions from 20 staff members.
Key takeaways
Well-designed shift templates are the single most reliable way to connect event operations to accurate payroll records.
| Point | Details |
|---|---|
| Design from success metrics | Derive roles from what staff must achieve, not from guest-count ratios. |
| Include all payroll-ready fields | Role, pay code, clock-in method, and break slots must be set before publishing. |
| Apply the 15–30–60 standby rule | Designate standbys with explicit activation windows for every critical position. |
| Integrate with time tracking | Map template fields to QR/PIN clock-in and auto-break detection for clean payroll exports. |
| Clockhq as implementation path | Clockhq supports shift creation, split-shift tracking, auto breaks, and payroll-ready CSV exports from one platform. |
What actually works when you build these in the field
The conventional advice is to start with headcount. Build the number, then fill the roles. Every experienced event manager eventually learns that approach fails at the worst possible moment, usually during the first 30 minutes of a high-pressure event when the plan meets reality.
Starting from peak moments and working backward is the method that holds. Assign standbys before you think you need them. Write break rotations as formal scheduled tasks, not informal notes. A template that treats a break as a scheduled position, with a named cover, prevents the simultaneous-break problem that leaves a zone empty during a crowd surge.
The sample template in this article is a starting point. Run it on one event, compare the scheduled hours to the actual clock-out data, and update it. One tested template is worth more than ten generic ones.
Clockhq makes your event templates work on the day
Running event shifts without a time-tracking layer means your template stays on paper. Clockhq connects the template to the actual shift: staff clock in via QR code or PIN, breaks are detected automatically, and split shifts are tracked as separate segments so freelance hours are captured correctly.
The payroll-ready CSV export means your reconciliation step is matching a report, not rebuilding hours from memory. Unlimited staff, browser and mobile access, and auto-break detection are included from day one. Start a 14-day free trial with no commitment, build one event template, and run a single shift to see how the clock-in data maps to your payroll export.
Useful sources and references
The operational and industry sources below informed this guide. Use them to expand templates for specific event types or to validate compliance requirements for your state.
- How to Build an Event Staffing Plan That Actually Works — covers demand-led staffing, the 15–30–60 rule, break rotations, and pre-event verification
- How to Plan Event Staffing Without Guessing the Headcount — task-based role derivation and the three-question framework
- Shift Patterns Calendar for Event Agencies — demand-driven scheduling logic and compliance flag integration
- How to Create a Staff Rota for Events — operational rota structure for multi-event, freelance-heavy teams
- Workforce Planning Techniques for Major Events — four-phase planning framework for event workforce management
- The Ultimate Guide to Event Staffing — experience-first hiring, technology integration, and staffing trends